
Looking for a reliable and efficient way to apply labels to your products? Look no further than the AP360 and AP362 Label Applicators from Primera. With their easy setup and fast, accurate labeling capabilities, these machines are a game-changer for any business in need of a labeling solution. In this video, we will guide you through the step-by-step process of setting up your AP360 or AP362 Label Applicator so you can start applying labels with ease.
Before we dive into the setup process, let’s take a closer look at the AP360 and AP362 Label Applicators. These machines are designed to streamline your labeling process, saving you time and ensuring that each label is applied accurately. With their advanced features and user-friendly interface, these label applicators are a must-have for any business that values efficiency and productivity.
Now, let’s get started with the setup process. Follow these simple steps to get your AP360 or AP362 Label Applicator up and running:
Step 1: Unboxing and Assembly
When you receive your AP360 or AP362 Label Applicator, start by carefully unboxing the machine and organizing all the components. Follow the included instructions to assemble the label applicator, ensuring that all parts are securely attached.
Step 2: Powering On the Machine
Once the label applicator is assembled, connect it to a power source and power it on. The machine will go through a quick startup process, initializing all the necessary components.
Step 3: Adjusting Label Sensors
Next, adjust the label sensors to ensure precise label detection. The AP360 and AP362 Label Applicators are equipped with advanced sensors that can detect the start and end of each label, allowing for accurate application. Follow the instructions provided to adjust the sensors according to your label size and material.
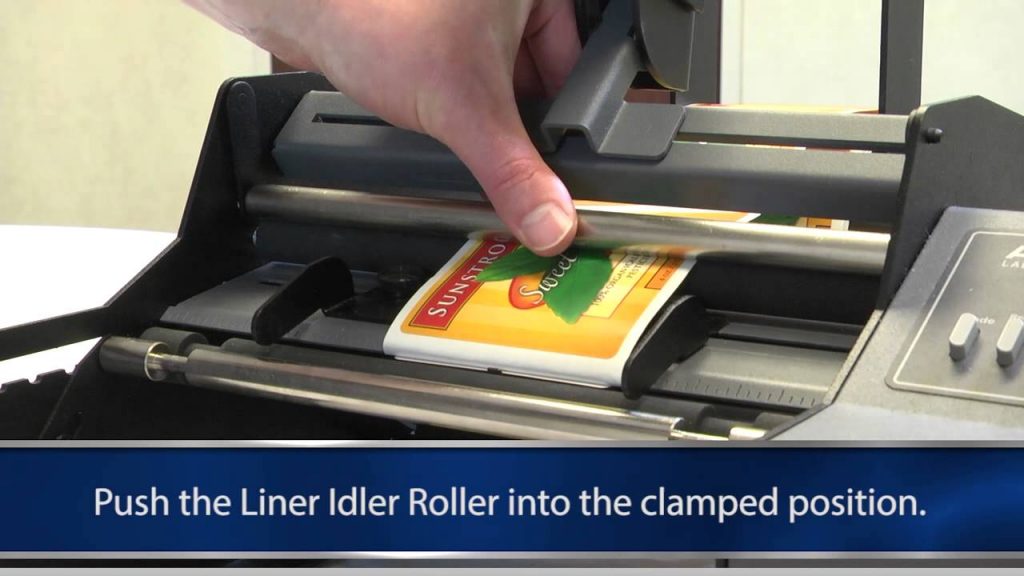
Step 4: Loading Labels and Ribbon (if applicable)
If you are using labels with a thermal transfer printer, you will need to load both the labels and the ribbon into the machine. Follow the instructions provided to ensure proper loading of the labels and ribbon, making sure they are aligned correctly.
Step 5: Setting Label Parameters
Using the control panel or software interface, set the desired parameters for your labels. This includes information such as label size, spacing, and alignment. The AP360 and AP362 Label Applicators offer various customization options to suit your specific labeling needs.
Step 6: Testing and Adjusting
Before you start applying labels to your products, perform a test run to ensure everything is functioning correctly. Apply labels to a sample product and check for any misalignments or issues. If necessary, make adjustments to the label parameters or sensor settings until you achieve the desired results.
Congratulations! You have successfully set up your AP360 or AP362 Label Applicator. Now, you can start applying labels to your products quickly and accurately, saving time and ensuring consistency in your labeling process.
In conclusion, the AP360 and AP362 Label Applicators from Primera are the perfect solution for businesses in need of a reliable and efficient labeling process. With their easy setup and advanced features, these machines will revolutionize the way you apply labels to your products. Don’t waste any more time with manual labeling – invest in a Label Applicator Machine and experience the benefits for yourself.
Check the coil packing solution with a leading manufacturer for the professional solution just here:
[Insert link to manufacturer’s website or relevant resource]
Remember, a Label Applicator Machine is the key to streamlining your labeling process and improving efficiency. Don’t miss out on this opportunity to take your labeling to the next level. Get your AP360 or AP362 Label Applicator today and start labeling with ease. Labeling Machine
“Effortless Label Application: Step-by-Step Guide for Efficient Labeling with the AP360 and AP362 Label Applicators”
Related posts: