Are you a beginner looking to explore the world of printing on shrink plastic? Look no further! In this YouTube video, I will guide you through the process of creating custom pins using printable shrink plastic. With the help of a Plastic Shrink Machine, we will bring your designs to life. So, let's dive in and get creative!
Printing on shrink plastic opens up a whole new realm of possibilities. Whether you want to make personalized pins, keychains, or even jewelry, this versatile material allows you to express your creativity in unique ways. And with the right tools, like a Plastic Shrink Machine, the process becomes even more seamless.
In this video, I will demonstrate how to use a Plastic Shrink Machine to print and shrink your designs onto plastic sheets. But before we jump into the tutorial, let's talk about the machine itself.
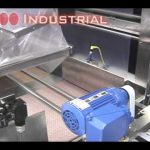
A Plastic Shrink Machine is a specialized device that applies heat to shrink plastic material. It typically consists of a heating element, a temperature control system, and a conveyor belt. This machine ensures that your designs are heated evenly, resulting in a consistent and professional finish.
Now, let's move on to the printing process. First, you'll need printable shrink plastic sheets, which can be easily found online or at your local craft store. These sheets are specially coated to allow ink to adhere to the surface.
Once you have your design ready, you can print it onto the shrink plastic sheets using a regular inkjet printer. Make sure to follow the printer's instructions for best results. It's important to note that you should print your design smaller than the desired final size, as the plastic will shrink significantly during the heating process.
After printing, it's time to cut out your designs. You can use scissors or a craft knife to carefully remove the excess plastic around your design. Take your time and be precise to achieve clean edges.
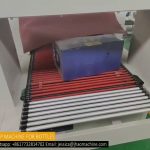
Now comes the exciting part – shrinking your designs! Preheat your Plastic Shrink Machine according to the manufacturer's instructions. Once heated, place your printed designs onto the conveyor belt and let the machine work its magic. As the plastic passes through the machine, it will shrink and thicken, resulting in a smaller and more durable version of your original design.
Once the plastic has fully shrunk and cooled down, you can remove your custom pins from the machine. Admire your handiwork and take pride in your unique creations!
Printing on shrink plastic is a fun and rewarding craft that anyone can enjoy. With a Plastic Shrink Machine, the process becomes even easier and more efficient. So, unleash your creativity and start making your own custom pins today!
Remember, practice makes perfect, so don't be discouraged if your first attempts aren't flawless. Keep experimenting with different designs, colors, and techniques to find your own unique style.
So what are you waiting for? Grab your Plastic Shrink Machine and start creating amazing custom pins with printable shrink plastic. The possibilities are endless!
Check the coil packing solution with a leading manufacturer for the professional solution just here: [Insert Manufacturer's Name]. Shrinking Machine
"Crafting Custom Pins with Shrink Plastic: A Step-by-Step Guide to Printing and Using a Shrink Machine at Home"
Related posts: